Most people hang a hammock once, sit in it sideways, decide it is fine for a nap, then try to sleep in it and wake up folded like a taco. The hammock gets the blame. It rarely deserves it.
If you want to hang a hammock correctly, only three things really matter: the angle of the suspension, the width of the straps, and whether the body and the lay match how you plan to use it. Everything else, the color, the carabiner style, the logo, is decoration. I have spent twelve years teaching people to sleep in trees, and a $25 hammock hung at 30 degrees beats a $250 hammock strung tight as a guitar string every single time.
This guide covers the whole job. Which hammock to start with for a stand and which to start with for trees, the step-by-step hang, and the mistakes that keep people awake at 3 AM.
Why you should trust me
I run a hammock camp outside Asheville every summer where we hang more than 20 hammocks for a weekend and measure what actually happens overnight: sag, fabric stretch, and what I call the 3 AM comfort test. That last one is the only score I care about. A hammock can look great in a showroom and still dump you into a banana curve by two in the morning.
My rules are simple. No recommendation without a full night in it. No tree-safety claim without checking strap width myself. No camping claim without a rain test. I have slept in more hammocks than beds in the last decade, and I have watched cheap parachute nylon tear on day two and premium systems shrug off a thunderstorm. The gear is not the mystery people think it is. The geometry is.
How I picked and how I tested
Everything I recommend has to answer four questions. Does it sleep flat at a 30-degree hang? Are the straps wide and tree safe? Does the fabric stretch out overnight? Would I trust it at 3 AM in the rain?
Those four questions sort hammocks into jobs fast. A hammock that lives on a stand is a different product from a hammock that goes in a backpack, and pretending otherwise is how people end up miserable. On a stand, the frame sets your sag and your only job is comfort. In the trees, you set everything, which means the suspension in the box matters as much as the fabric.
I also check the small stuff that ruins otherwise good hammocks: bug nets that only zip from the outside, "double" bodies sized for one adult, and anything that ships with rope instead of straps. Rope is the fastest way to girdle a tree and the fastest way to wake up on the ground.
Start with the right hammock for the job
Two very different hammocks cover almost every situation a normal person runs into. One is built to hang between two trees and travel. The other is built to live on a stand in the yard or on a porch.
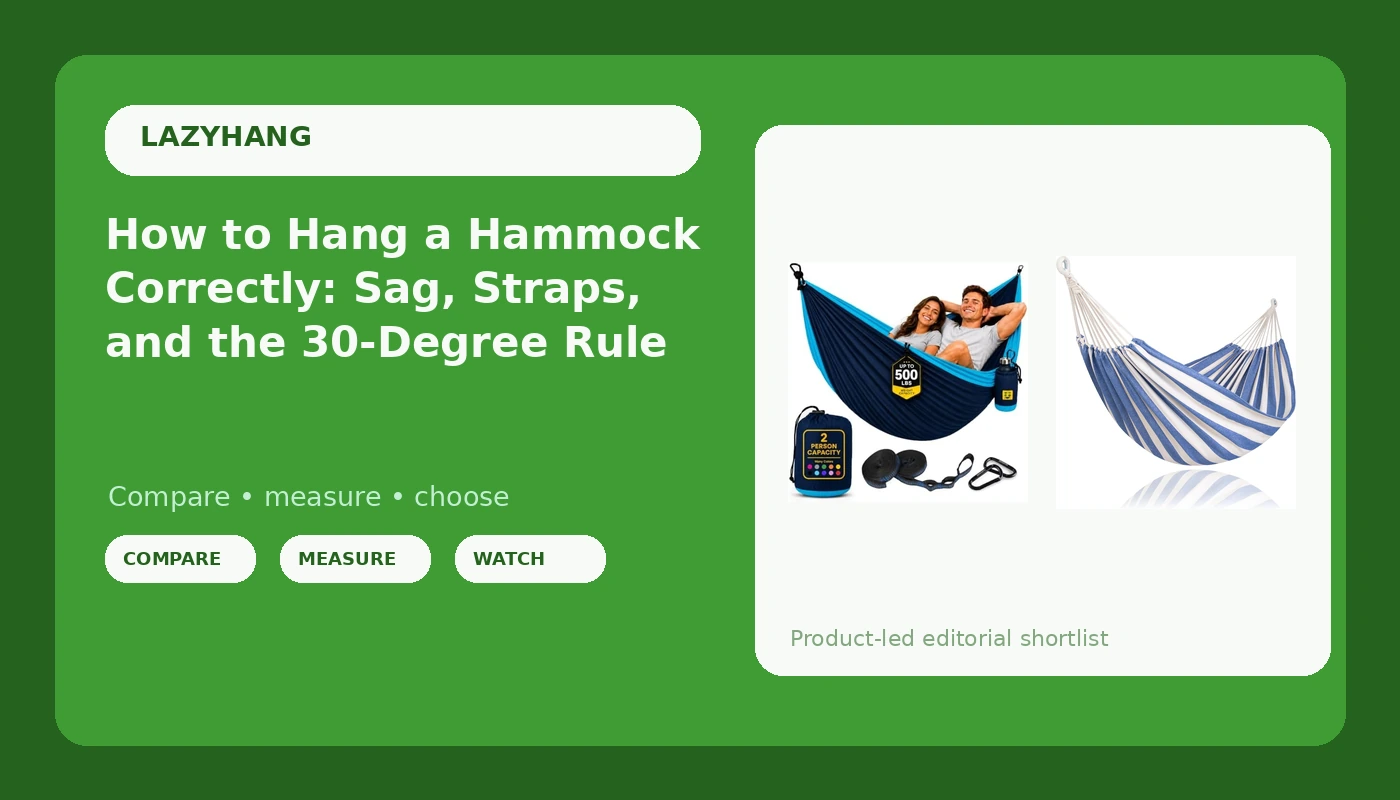
The camping and travel pick: Durable Hammock 500 lb Capacity, Nylon Camping Hammock Chair - Double or Single Sizes w/Tree Straps and Attached Carry Bag - Portable for Travel/Backpacking/Beach/Backyard (Large, Blue & Light Blue)
 Visit on Amazon →
This is the shape most people picture when they hear the word hammock: nylon, packable, rated to 500 lb, with tree straps and an attached carry bag included. That strap detail is the reason it belongs in a how-to guide about hanging, because the box does not hand you rope and ask you to figure it out. Straps in the box means the tree protection question is answered before you leave the driveway.
The 500 lb capacity and the double or single size options matter more than they sound. A wider body lets you lie on the diagonal, which is the entire trick to sleeping flat instead of curling up like a shrimp. If you plan to camp in it, order the larger size and accept the few extra ounces. The attached carry bag is a small thing that saves you every single trip, because a loose stuff sack is a lost stuff sack.
Check current Amazon price at the link above. Nylon at this price point is not going to be the last word in weatherproofing, and it will stretch a little overnight, which is exactly why the next section of this guide exists. Hang it with a structural ridgeline and the stretch stops being your problem. For travel, backpacking, the beach, and the backyard, it does the job without asking you to spend camping-system money.
Flaws but not dealbreakers: Nylon bodies have some give, so if you hang it drum tight you will feel every inch of that stretch by morning. Hang it loose. The included straps are functional, and you should still check the width against the trees you plan to use.
Anyone who wants one hammock that goes from the trailhead to the porch without a second thought will be happy here.
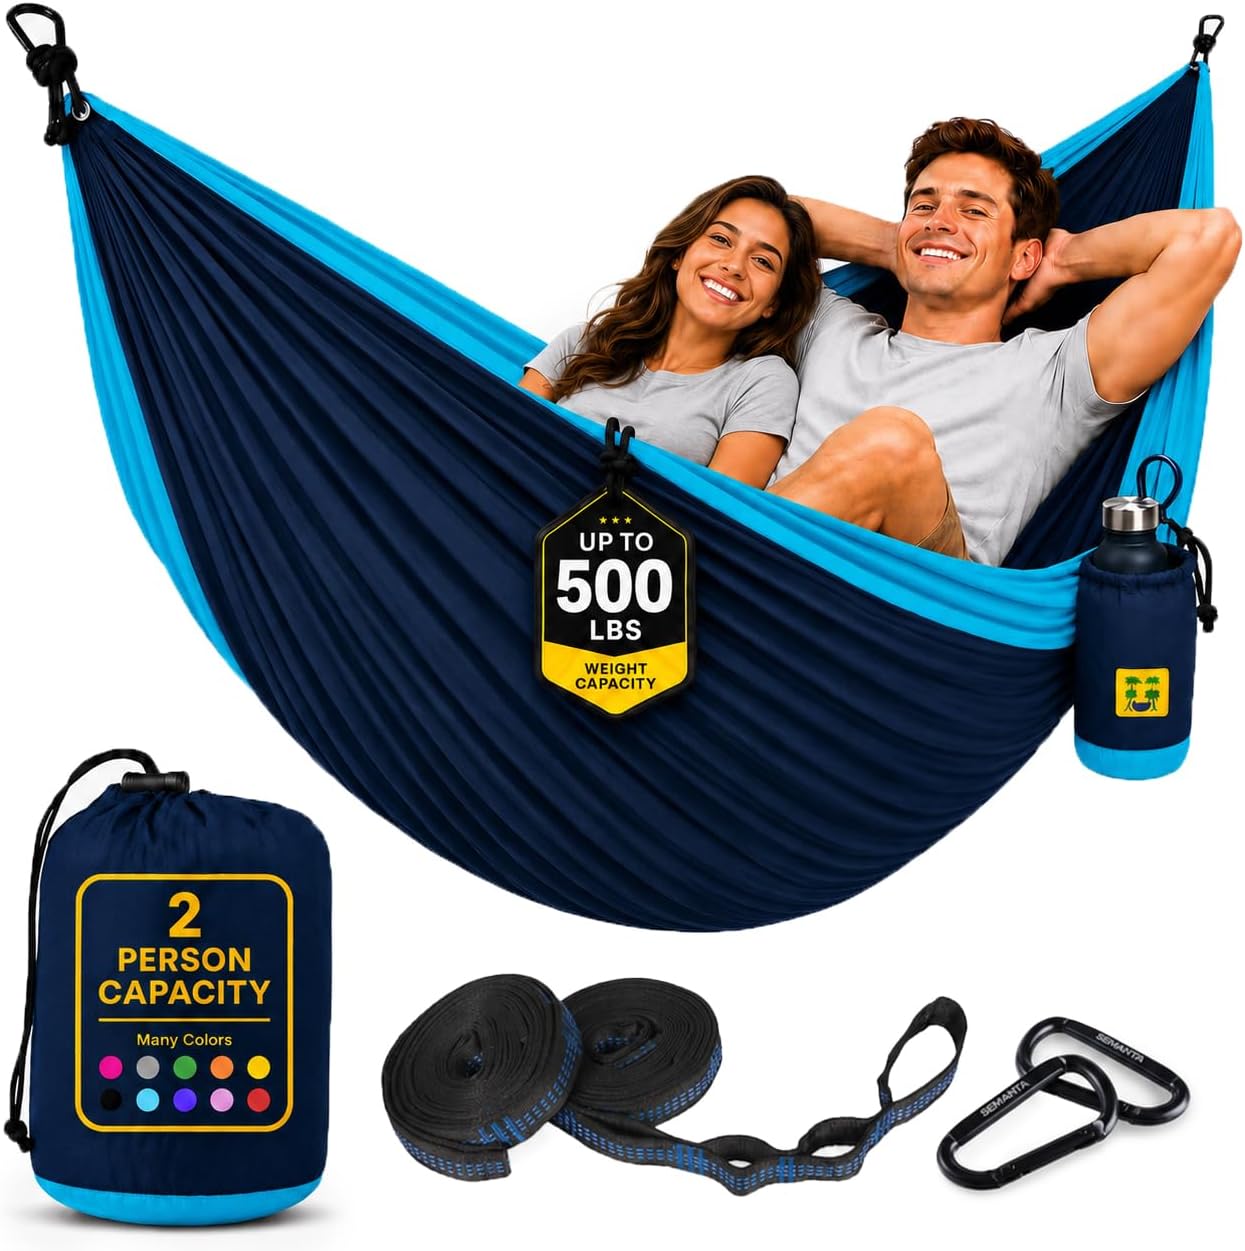
The stand pick: SUNCREAT Long Replacement Hammock Two Person for Stand, Blue White Stripes
 Visit on Amazon →
A stand hammock is a different animal, and that is a good thing. The frame sets your sag, so you skip the entire geometry lesson and go straight to the part where you cancel your afternoon plans. This is a long, two-person replacement body sized for a stand, with the blue and white stripe look that belongs in a yard rather than a backpack.
Because it is a replacement hammock, measure before you buy. The two numbers that matter are the length of the body and the spacing between your stand's spreader bars. A long hammock on a short stand hangs deep, and a deep hang turns a two-person hammock into a two-person chair. Match the body to the frame and you get a flat, wide lay that two adults can actually share.
Check current Amazon price at the link above. This is the hammock I point people toward when the trees in their yard are ornamental, too young, or too close to a fence. A stand plus a long body is also the easiest way to introduce a kid or a skeptical partner to hammock time, because there is no 30-degree angle to argue about and no tree to protect.
Flaws but not dealbreakers: It is not a camping hammock and it is not trying to be. There are no tree straps because you do not need them. Store it dry and out of direct sun when the season ends and the fabric will hold its color and its shape.
Anyone with a stand, a porch frame, or a pair of sturdy posts already in the ground should look here first.
The hang, step by step
Now the part that decides whether you sleep or suffer. This works with any hammock that hangs from trees.
Step one: Pick trees you will not hurt and that will not hurt you. Look for trunks roughly 6 to 8 inches in diameter, alive, with no dead limbs overhead. Dead limbs have a name in this hobby: widowmakers. Look up before you look at your straps.
Step two: Strap width, not rope. Two-inch wide straps spread your weight across the bark. Anything narrower digs in, and rope girdles a tree by cutting off the layer that carries water and nutrients. If a hammock ships with rope, buy straps and leave the rope in the bag.
Step three: Set your strap height. With an empty hammock, the straps should sit around head height on the trees. Once you are in it, the hammock body should land roughly at chair-seat height. Too high and you need a ladder to get in. Too low and you scrape the ground all night.
Step four: Find 30 degrees. This is the whole game. Hold your hand out in a karate chop and imagine the angle between your thumb and forefinger. That is roughly 30 degrees, and it is the angle your suspension should make coming off the tree. If your straps leave the trunk almost horizontal, you are too tight, and a tight hammock gives you a narrow, unstable, shoulder-squeezing lay.
Step five: Sit before you lie. Lower yourself in and let the hammock settle. Fabric relaxes, knots tighten, and straps creep a little on the first sit. Adjust once, then commit.
Step six: Add a structural ridgeline. A ridgeline is a cord running from one end of the hammock to the other, set at roughly 83 percent of the body length. It locks in your sag so the hang is identical every time, even when the trees are farther apart than you wanted. This is the single upgrade that turns a nap hammock into a sleep system.
Step seven: Lie on the diagonal. Do not lie down the centerline. Shift your body so you are lying corner to corner, at maybe 15 to 20 degrees off the axis of the hammock. That is what flattens your back. A centered lie is what gives you the banana curve everyone complains about.
Step eight: Raise the foot end. Set the foot end of the hammock a few inches higher than the head end. Gravity slides you toward the low end, so a level hang slowly deposits you in a pile at the foot. A small lift keeps you where you put yourself.
Step nine: Insulation underneath. Below roughly 65 to 70 degrees, you need something under you. Compressed sleeping bag insulation does nothing beneath your body, because you crush the loft. An underquilt or a pad is the difference between camping and shivering until sunrise.
Step ten: Tarp if there is any chance of rain. A rain fly on its own ridgeline above the hammock keeps you dry and blocks wind. It is not an accessory. It is the reason you wake up rested instead of wet.
The mistakes that ruin the 3 AM test
The most common failure is the tight hang. People think tight equals supportive, so they crank the straps until the hammock is a trampoline. Tight hangs are narrow, tippy, and unforgiving on your shoulders. Loose is not sloppy. Loose is correct.
The second mistake is skipping the diagonal lie. If you lie straight down the middle, no ridgeline, no fabric, and no amount of money will make you flat. Learn the diagonal once and you will never go back.
The third is ignoring the trees. Straps that are too narrow, bark that is thin, or a trunk that is dead all turn a pleasant night into damage you cannot undo. Check the strap width, check the trunk, and never hang from a tree you would not trust to hold a car.
The fourth is treating the tarp and the insulation as optional. They are the difference between a nap and a night. Backyard hammocking can survive without them. Camping cannot.
What this all costs
I am not going to quote prices here, because they move with every sale and they are not what decides whether you sleep. Check current Amazon price on both hammocks at the links above and you will see what I mean: the difference between the tree hammock and the stand hammock is smaller than the difference between a good night and a bad one.
What you are actually buying is a short list. A body, either a packable nylon one for trees or a long one for a stand. Straps, two inches wide, for anything that hangs from bark. A ridgeline, which costs almost nothing and does the most work. Insulation for shoulder seasons. A tarp for weather. Everything on that list is replaceable, upgradeable, and cheaper than a bad hotel room.
The short version
Hang your straps at head height. Aim for a 30-degree angle coming off the tree, which means looser than your instinct says. Lie on the diagonal. Add a ridgeline so the hang repeats. Lift the foot end a few inches. Insulate underneath. Cover up if the sky looks unsure.
Do those things and you will stop thinking about the hammock at 3 AM, which is the highest praise a sleep system can earn. Pick the body that matches your trees or your stand, hang it correctly, and let the afternoon go.